
A wooden shutter hook consists of two distinct elements: a wall piece (hook or strike) fixed to the window frame, and a pin or spring stop screwed onto the inner face of the shutter. The strength of the whole assembly depends less on the hook itself than on the nature of the wall support and the choice of screws.
Before drilling anything, the question to ask concerns the type of wall. A solid stone, hollow brick, or degraded plaster frame is not treated the same way, and this is often where failed installations originate.
Classic hook, shock-absorbing stop, or adjustable model: which one protects the frame?
The classic tension hook remains the most widespread. It works with a pin screwed into the wood of the shutter and a hook sealed or anchored into the wall. Its main drawback: when the wind pushes the shutter, all the energy of the flap is transferred to the wall anchor point. On an old frame or fragile plaster, this eventually erodes the masonry.
Shock-absorbing shutter stops incorporate a rubber or elastomer pad that absorbs the impact of the shutter before it hits the wall. The wall strike then serves as a receptacle, not a rigid stop. This mechanism reduces vibrations transmitted to the frame and limits the chipping of the plaster around the fixing point.
Recent models go further with an adjustable arm and automatic return, compatible with wood, aluminum, and PVC. Their advantage for a heavy wooden shutter: the arm holds the shutter open without it resting against the facade, eliminating friction on the plaster.
It is possible to fix a classic wooden shutter hook on a sound wall. On a frame that is already damaged or a soft plaster, a shock-absorbing stop or an adjustable model prevents further damage.
Adapting the wall fixing to the actual support
The majority of installation failures come from an unsuitable plug for the wall, not from a defect in the hook. The support dictates everything else.
Solid wall (stone, concrete, solid brick)
A concrete drill bit of the diameter of the plug is sufficient. Standard nylon plugs hold well in these supports. Drilling should be perpendicular to the wall, without forcing to avoid enlarging the hole.
Hollow wall or hollow brick
Classic plugs turn in the void. It is necessary to use expansion plugs for hollow materials, which spread behind the inner wall. Without this precaution, the hook will pull out at the first serious gust of wind.
Frame in degraded plaster
When the plaster crumbles at touch, direct installation should be avoided. Two options: seal the hook with mortar (chemical mortar), or install a distribution plate that spreads the load over a larger surface. In both cases, it is necessary to first remove the friable plaster until a hard support is found.
Installation of the wooden shutter hook: concrete method
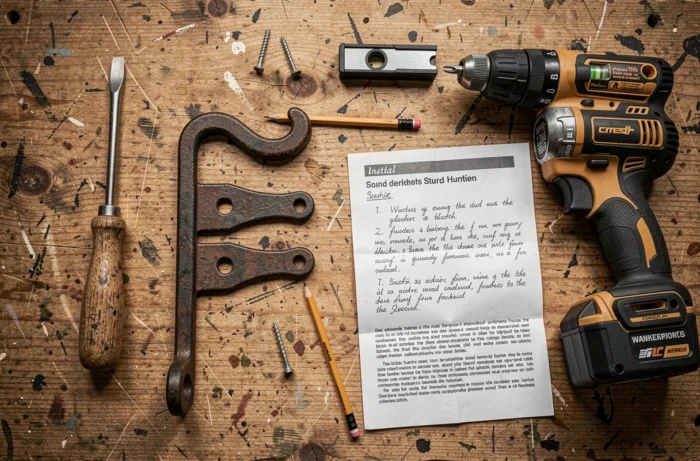
The necessary equipment fits in a standard toolbox:
- A drill with a bit suitable for the wall (concrete or wood as applicable) and a small diameter bit for pilot holes in the shutter
- Plugs corresponding to the wall support, countersunk wood screws for the shutter, a Phillips screwdriver
- A pencil, a measuring tape, and a spirit level for marking
Marking the location
Open the shutter in the desired locking position. The wall hook should be located on the inner face of the frame, at a height between one-third and half of the shutter. Mark the position of the hook on the wall with a pencil, then the position of the pin (or spring stop) on the shutter.
The hook of the spring stop must point towards the hinges, not outward. This is a common mistake that prevents the mechanism from functioning correctly.
Drilling and fixing on the wall side
Drill to the diameter of the plug (often 8 mm for a standard tension hook). Insert the plug with a hammer, without letting it protrude. Screw the hook or wall strike all the way in.
If the hook is fixed by chemical sealing, fill the hole with resin, insert the threaded rod, and wait for complete polymerization before applying stress to the fixing.
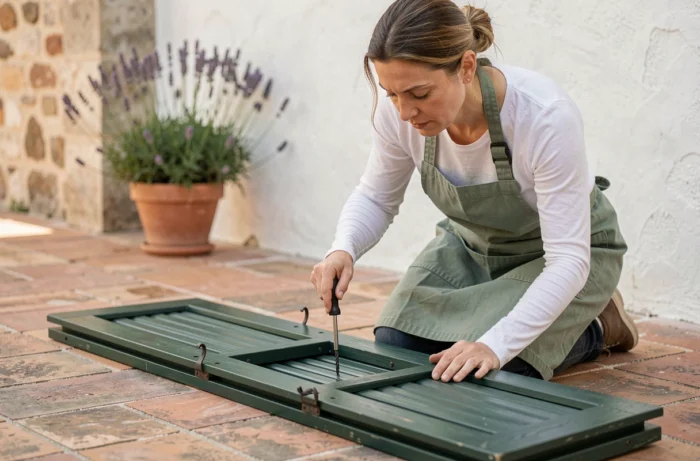
Fixing on the shutter side
For a simple pin, drill a pilot hole with a diameter smaller than that of the pin, then screw it in by hand or with pliers. For a spring stop, you must first cut a through slot in the shutter to the dimensions indicated by the manufacturer, then fix the assembly with countersunk wood screws.
Drill the pilot holes without going through the shutter to avoid weakening the outer face of the leaf.
Installation errors that damage the shutter or the wall
Three situations frequently arise during repair interventions.
- Plug too short or poorly adapted to the support: the hook holds for a few weeks then pulls out a piece of plaster when coming out of the wall
- Pin screwed in without a pilot hole in hard wood (oak, chestnut): the wood splits along the entire length of the stile, making the shutter irreparable at that point
- Location too high or too low: the shutter works in overhang, the pin gradually twists, and the leaf ends up rubbing against the frame with each operation
On an old wooden shutter, replacing a pulled-out hook often requires filling the old hole with a glued wood plug before re-drilling next to it. Screwing in the same spot in already splintered wood does not hold.
The choice between a standard tension hook and a shock-absorbing or adjustable stop directly depends on the condition of the frame and the weight of the shutter. A full-height solid wood shutter exerts a flapping force that only a shock-absorbing system can withstand without degrading the wall. For a lightweight shutter on a sound wall, the classic hook remains the simplest and least expensive solution to install.